Oxford Mini Pumps
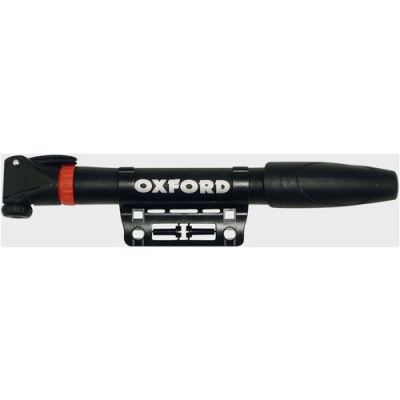
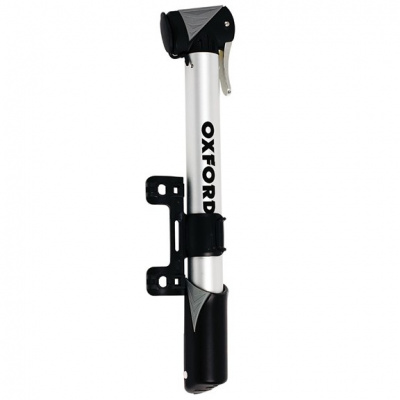
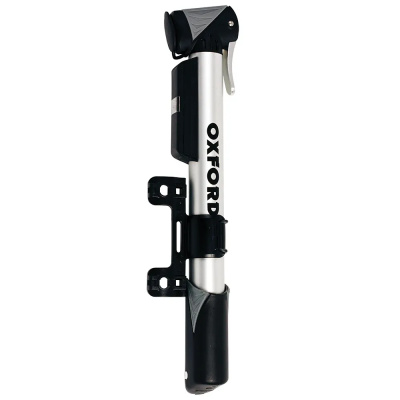
Oxford mini pumps are the kind of kit you only miss when you've left them at home - halfway up a Pennine lane with a rear tyre going soft. Compact enough to disappear into a jersey pocket or clip under a bottle cage, they cover the basics that matter most: solid alloy or composite construction, reversible valve heads for both Presta and Schrader, and mounting brackets that don't rattle loose on the first pothole. Whether you're commuting through Bristol on a hybrid or grinding gravel in the Dales, there's a pump in the Oxford range sized to the job.
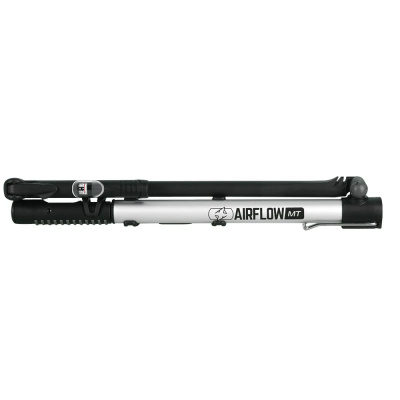
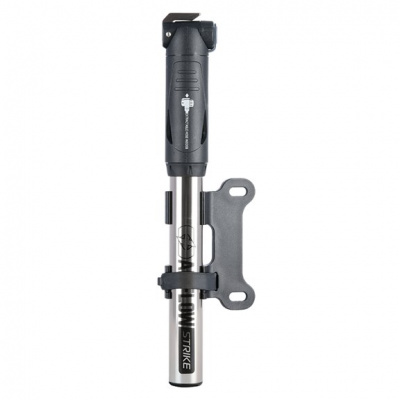
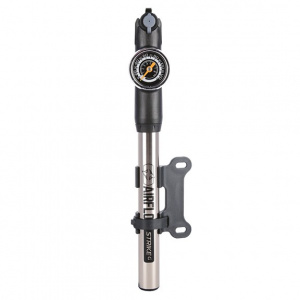
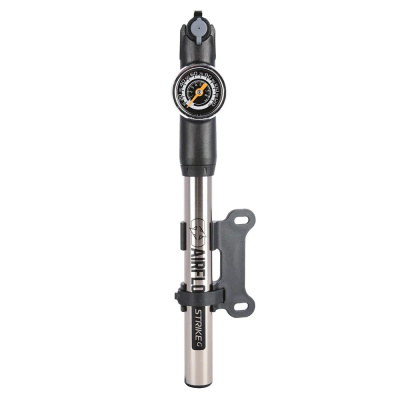
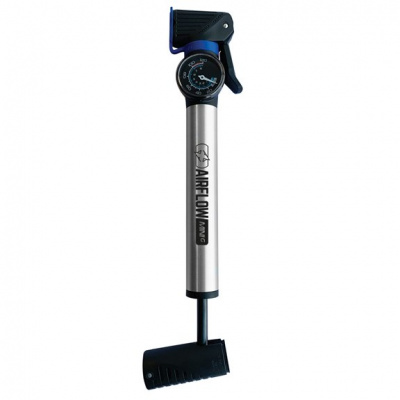
The range splits cleanly between high-pressure road models - capable of pushing tyres up to the kind of PSI that keeps a 25c rolling properly - and high-volume mountain bike pumps that shift more air per stroke to seat wider, tubeless-ready casings quickly. Both use alloy construction on the premium end, with a thumb-lock lever mechanism that grips the valve head without chewing up delicate Presta cores. For home workshop use or pre-ride top-ups, take a look at Oxford Track Pumps for floor-standing high-pressure inflation.


Prices and availability can change quickly. Delivery charges are not always included in listed prices.
Final price, stock status and delivery terms are set by retailer. We may receive a commission on purchases made.
Will It Fit Your Valves? Compatibility and Mounting Explained
The short answer is yes - most Oxford mini pumps cover both valve standards. The way it works is straightforward once you've done it once. Unscrew the cap on the pump head, pull out the rubber grommet and plastic insert, flip both pieces so the narrower openings face outward, then reinsert and retighten the cap. That reversal switches the head from Schrader (the wider, car-style valve found on hybrids and kids' bikes) to Presta (the slimmer, threaded type on road bikes and modern MTB). It takes about thirty seconds on the road, even with cold fingers.
One thing worth knowing before you push that head onto a Presta valve: engage the thumb-lock lever before you start pumping. If you force the head on without it, you risk catching the valve core and unthreading it - which turns a simple puncture fix into a much worse problem. Engage the lever first, feel it grip, then pump. It's the kind of detail that saves a lot of grief on a wet Tuesday evening.
For mounting, most Oxford pumps include a plastic mounting bracket designed to sit between your bottle cage and the frame bosses - standard 64mm spacing. Remove the cage bolts, drop the bracket in place, refit the cage over the top, and tighten back down. It's clean, it doesn't add bulk, and it keeps the pump accessible without eating into pocket space. That said, pumps mounted low on the down tube do catch front wheel spray, so if you're riding through winter mud regularly, keep reading the maintenance section below.
HP vs HV: Picking the Right Oxford Pump for Your Bike
This is the decision that catches people out. Oxford's range divides between high pressure (HP) and high volume (HV) pumps, and they're not interchangeable - buying the wrong one for your bike type means either not getting enough air in or pumping your arm off trying to reach road-tyre pressures.
HP models are built for road bikes and cross bikes running narrow tyres at 80 - 120 PSI. The telescopic barrel design - where the inner chamber extends to increase stroke length from a compact resting size - is what makes high-pressure inflation achievable from a pump that fits in a back pocket. You won't sprint to 100 PSI in ten strokes, but you'll get there without needing to stop and shake out your arm every thirty seconds. CNC machined alloy barrels, found on the premium models, add durability and a tighter internal tolerance that improves compression efficiency compared to the plastic-bodied entry-level options.
HV pumps are a different tool. They move more air per stroke, which is exactly what you need when seating a 2.4-inch MTB casing or a gravel tyre that's lost sealant mid-ride on the Ridgeway. The trade-off is a lower pressure ceiling - typically 60 - 80 PSI - which is fine for wider rubber but won't get a road tyre firm. If you're on a gravel bike doing double duty, think carefully about the pressures you actually need before you buy.
At the budget end, the composite plastic models do the job for occasional commuters who mostly need something that lives in the saddlebag and gets used twice a year. They're lighter and cheaper, but the alloy construction of the upper-range pumps handles repeated use and UK grime considerably better. Brands like Lezyne and Topeak compete here at similar price points with their own CNC alloy options - worth comparing if you want to see what else is available. SKS and Blackburn are also worth a look if ergonomics or hose-head attachments are a priority for you.
Surviving UK Grit: Keeping Your Oxford Pump Working
A mini pump mounted under the down tube takes a punishment that most riders don't think about until the thing stops working. Front wheel spray throws grit, road salt, and winter mud directly at the main shaft - and over time that works its way past the PSI/Bar gauge housing and into the barrel, drying out the O-ring seals that keep compression intact. When the pump starts feeling loose or loses pressure on each stroke, that's usually the culprit.
The fix is simple and costs nothing: wipe down the pump shaft every few weeks, particularly after muddy rides or wet commutes. Apply a small drop of silicone lubricant to the main O-ring - not degreaser, which strips the rubber and makes the problem worse faster. That keeps the seal supple and the compression consistent whether you're using it in January sleet or August dust.
Always replace the dust cap on the valve interface after use. It sounds obvious, but it's the first thing people lose or skip, and a clogged valve interface on a cold roadside is genuinely annoying. If you're commuting year-round, it's also worth checking that the mounting bracket bolts haven't loosened - pothole-heavy urban roads vibrate pump mounts more than you'd expect, and a pump that drops off somewhere in East London isn't much use when you need it. Pairing your pump with an Oxford saddle bag gives you a second option for carrying it securely, particularly on longer rides where frame mounting isn't ideal.
If you're putting together a complete roadside kit, Oxford rucksacks are worth considering for carrying a fuller repair kit on longer days out - especially if you're heading somewhere remote enough that a single CO2 cartridge and a prayer isn't sufficient backup.
Oxford Mini Pumps FAQs
How do you change an Oxford mini pump from Schrader to Presta?
Unscrew the cap on the pump head, pull out the rubber grommet and plastic insert, then flip both pieces so their narrower openings face outward. Reinsert them and screw the cap back down - that's it, you're set for Presta valves.
What is the maximum PSI of an Oxford mini pump?
Oxford's high-pressure road models can typically reach 100 - 120 PSI, though it takes real effort at the top end. High-volume MTB pumps usually cap around 60 - 80 PSI - lower ceiling, but they shift air into wider tyres much faster per stroke.
How do you mount an Oxford mini pump to a bike frame?
Most Oxford pumps include a plastic bracket that slots between your bottle cage and the frame's bottle boss mounts (standard 64mm spacing). Remove the cage bolts, fit the bracket against the frame, refit the cage over it, and tighten the bolts back down. Clean and secure.